Menu

Sunday 30 November 2014

Skype Status Display For a User in MVC

Scenario
This article explains how to display the user Skype status in the user profile in a MVC application. The administrator in a site wants to view the list of users with his/her Skype status and also wants to chat/call by clicking on the Skype status in the user profile.

Prerequisites


To display the Skype status in a public site, the Skype user must check (select) the privacy setting "Allow my online status to be shown on the Web". You can go to the settings by navigating from the Skype menu Privacy settings and check the "Allow my online status to be shown on the Web" as shown in the following screenshot.


Implementation


Step 1

Create a new project named UsersSkypeStatusInMVC and choose the template MVC. It then creates an MVC template project.

Step 2

Add a Controller named AdminController with the following procedure.
  1. Right-click on the "Controllers" folder and select the Add option and click on the "Controller" link.

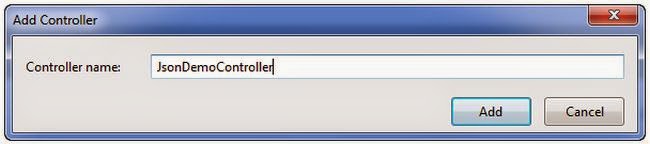
  2. It opens a pop-up and then select the option MVC 5 Controller – Empty and then click on the "Add" button.

  3. Again, it opens a popup and then provide the name as AdminController and click on the "Add" button.
Now, the controller is created with a default code.

Step 3

In this step, Add a Model named "UserModel" using the following procedure.
  1. Right-click on the "Models" folder and select the "Add" option and click on the "Class...".

  2. It opens a pop-up and then enter the name as "UserModel.cs" and click on the Add button.
After adding the model, replace the existing code in the file "UserModel.cs" with the following code.

namespace UsersSkypeStatusInMVC.Models    
{    
    ///     
    /// User Model    
    ///     
    public class UserModel    
    {    
        public int UserId { get; set; }    
        public string Name { get; set; }    
        public string Email { get; set; }    
        public string SkypeId { get; set; }    
        public string ProfileImagePath { get; set; }    
    
    }    
}  


Step 4

This step, replace the existing code in the "AdminController.cs" file with the following code.

using System.Collections.Generic;    
using System.Web.Mvc;    
using UsersSkypeStatusInMVC.Models;    
    
namespace UsersSkypeStatusInMVC.Controllers    
{    
    public class AdminController : Controller    
    {    
        // GET: UsersProfile    
        public ActionResult UserProfiles()    
        {    
            List usersList = GetUsers();    
            return View(usersList);    
        }    
    
        ///     
        /// Get the list of sample users    
        ///     
        /// User List    
        private List GetUsers()    
        {    
            var usersList = new List    
            {    
                new UserModel    
                {    
                    UserId = 1,    
                    Name="Ramchand",    
                    Email = "ram@abc.com",    
                    SkypeId = "ramchand.repalle", // Skype Id    
                    ProfileImagePath = "Ramchand.jpg"    
                },    
                new UserModel    
                {    
                    UserId = 2,    
                    Name="Abc",    
                    Email = "chand@abc.com",    
                    SkypeId = "abctest",// Skype Id    
                    ProfileImagePath = "abc.jpg"    
                },    
                new UserModel    
                {    
                    UserId = 3,    
                    Name="def",    
                    Email = "def@abc.com",    
                    SkypeId = "ram",// Skype Id    
                    ProfileImagePath = "def.jpg"    
                }    
            };    
    
            return usersList;    
        }    
    }    
}  

About Code
  1. The GetUsers() method will provide a sample list of users.

  2. You will call that method in the UserProfiles Action Result method and then send that list of users to the view.
Step 5

This step, add a view for the UserProfiles Action controller method by the following procedure:
  1. Right-click on the View() method in the UsersProfile Action method and click on "Add View".

  2. Enter the view name as "UserProfiles" and then click on the "Add" button.
Step 6

This step replaces the existing code in the "UserProfiles.csthtml" file design with the following code.

@model IEnumerable     
    
@{    
    ViewBag.Title = "User Profiles";    
}    

User Profiles

@foreach (var item in Model) { var skypeId = @Html.DisplayFor(modelItem => item.SkypeId); var profileImg = "../../Images/" + @Html.DisplayFor(modelItem => item.ProfileImagePath);
@Html.DisplayFor(modelItem => item.UserId)
@Html.DisplayFor(modelItem => item.Name)
@Html.DisplayFor(modelItem => item.Email)
ProfilePic
}

About the Design 
  1. Added a namespace to get the list of users.

  2. CSS styles are defined.

  3. A foreach loop helps to display the list of users with respective details.

  4. Skype: {SKYPE ID}?chat: This is the href tag, you can use to chat the Skype by clicking on that. For example: skype:ramchand.repalle?chat

  5. Skype: {SKYPE ID}?call: This is the href tag, you can use to call the Skype by clicking on that. For example: skype:ramchand.repalle?call

  6. JavaScript function SkypeUserStatus helps to assign the Skype status image.

  7. SetInterVal has been used to call the SkypeUserStatus function periodically to get the current Skype status of a user.
Step 7

This step helps you about Skype Status URL information and other details. To display the Skype status of any user, you have to request the URL format as follows.

The format of the URL is: http://mystatus.skype.com/{SIZE OF ICON}/{SKYPE ID}

{SIZE OF ICON}: It indicates to display the size of the icon based on user Skype status.

For example: smallicon, mediumicon

{SKYPE ID}: It indicates the Skype Id of the user.

For example: ramchand.repalle

So, the example of the Skype status URL is http://mystatus.skype.com/mediumicon/ramchand.repalle.

You can get the status of the user by just clicking on the previously shown URL.

Step 8

Add a new folder named “Images” with sample images to the “UsersSkypeStatusInMVC” project. It helps display the sample image for the profile picture as mentioned in the "GetUsers()" method in AdminController.


Step 9

Now, build the application (F6), then run (hit F5) an application and navigate to the following URL: (http://localhost:57882/Admin/UserProfiles).


As in the preceding screenshots by clicking on the (Skype) icon it displays a popup to launch the application in Skype. You just click on that then it would open a Skype user window.

The Skype status images are displayed as described below.


The discussed project source code can be downloaded from the link Source Code.

Conclusion


I hope this article helps you to display the Skype user status with the user profile details in a MVC application.


Multilingual MVC Application With Customized JS Bundles Based on User Language

About

This article shows how to create multilingual MVC applications with JS bundles based on various languages. Here, you will learn about multilingual MVC application implementation flow, the creation of customized JavaScript bundles with translated alert messages based on user language, custom HTML helper classes, how to set user language in a cookie based on his login, displaying resource translation values in a form and how to maintain names and values in resource files.

Scenario

You will implement an MVC application to be displayed in various languages based on the user selected language. The form content is being displayed from the resource file based on the name and respective language and it would need to display the alert kind of information from customized bundled JavaScript based on user language whenever the user has done a form submission or input validation and so on.

RoadMap
 
When implementing the previous sample MVC application, you will learn the following concepts.
  1. Resource File creation with key, value pair combination for required language.
  2. Resource Key value display in a form based on user language.
  3. Cookie implementation in MVC.
  4. Bundling and Minification.
  5. Custom HTML helper class.
  6. Customized Bundle creation.
  7. Translate the JavaScript alert messages into user selected language.
  8. Localized JavaScripts minified and bundled, It helps to increase the performance of form.
Step 1

Create a new project named “MultilingualMVCApp” and choose the template “MVC” then it creates an MVC template project.

Step 2

Add a new application folder named “App_GlobalResources” to maintain the resource files with key/value pair combinations for various languages. Right-click on the Project “MultiLingualMVCApp” and select on “Add” and then select “Add ASP.NET Folder” and then click on “App_GlobalResources” like the following.


Step 3

Create a resource file named “Notifications.resx” for the default language English by following the following screenshots. Right-click on the “App_GlobalResources” folder, select “Add” and then click on “Resource file” and specify the name as “Notifications” and then click on the “Ok” button.


Click on "Resources File" and provide the name as "Notifications" as shown in the following screenshot.


In the similar way, create another resource file named “Notifications.fr.resx” under the App_GlobalResources file. After completion of these aforesaid procedure, the Solution Explorer looks like the following.


Step 4

In this step, you will add sample resource keys with translation values for English and French languages. For that double click on the “Notifications.resx” file, then the displayed file has three columns named Name, Value and Comments.
Name: This name field is treated as the Resource Key value and it should be unique in the file and not be empty.
You can now enter the sample key and respective values as shown in the following screenshot for the default language (English).


In the same way, you can add the same key values, whichever were specified in the “Notifications.resx” with respective translated values for the French language in the “Notifications.fr.resx” file is as follows.


Note: Here, I have used the Google translator to translate the sample English content to French content.
In the same way, you can add various resource files for different languages as said and you can add multiple resource types to the resx files (like strings, images, icons and so on) based on your needs.


Step 5

You can now create one controller named “DemoController” with the following procedure.  Right-click on the “Controllers” folder and select the “Add” option and click on the “Controller” link.


Click on the "Controller.." link and select the option “MVC 5 Controller – Empty” and then click on the “Add” button. Then, specify the name as “DemoController” then click on the “Add” button.
Now, the controller is created with the default action named “Index” like the following.


Step 6
Add a view to the Index action method by right-clicking on the View function and click on “Add View” and then click on the Ok button. The following screenshots help you do that.


Click on "Add View..." then it opens a popup like the following.


Now, click on the "Add" button and then it will create an Index.cshtml file.

Step 7
 
Replace the existing design with the following design format that contains a sample form to enter the user name, select the user preferred language and the submit button.

@{  
    ViewBag.Title = "Index";  
}  
  

Demo

@using (Html.BeginForm("Index", "Demo", FormMethod.Post)) {

}

Now, build the application (F6) and run the application (F5) with the following URL (http://localhost:49624/Demo/Index) then the displayed form looks like the following.  


Step 8
In this step, write a piece of code for the post action of the submit button to set the user language code in the cookie, the user name in the TempData object (that helps to send data from one controller request to another) and then redirects to the home page.

    [HttpPost]  
     public ActionResult Index(FormCollection collection)  
     {  
         TempData.Add("LoggedInUser", collection["txtName"]);  
         string language = collection["ddlLanguage"];  
         SetCulture(language);  
      
         return RedirectToAction("Home");  
     }  
      
     ///   
     /// Set the culture based on culture code and set the   
     /// value in cookie  
     ///   
     ///   
     private void SetCulture(string cultureCode)  
     {  
      
         var cookieCultureLanguage = new HttpCookie("UserLanguage")  
         {  
             Value = cultureCode  
         };  
      
         Response.Cookies.Set(cookieCultureLanguage);  
      
         //Sets  Culture for Current thread  
         Thread.CurrentThread.CurrentCulture =  
         System.Globalization.CultureInfo.CreateSpecificCulture("en");  
      
         //Ui Culture for Localized text in the UI  
         Thread.CurrentThread.CurrentUICulture =  
         new System.Globalization.CultureInfo(cultureCode);  
      
     }  

The cookie that you have set in the previous code using the method “SetCulture” helps to display the respective user-selected language translated values in a form from the resource file.

Step 9

In this step, add one controller action method named “Home” to the "DemoController.cs" file with the respective view named “Home.cshtml” file.

///   
/// Home Action Controller Method  
///   
///   
public ActionResult Home()  
{  
    return View();  
}

Then, right-click on the View() method in the Home action and then click on "Add View..". After clicking on “Add View” it opens a template then click on the “Add” button then it creates a “Home.cshtml” page with default design. You can leave the design as it is, in later steps you can add the respective design changes.

Step 10

Add a method named Application_AcquireRequestState to the Global.asax.cs file that helps to set the culture based on the user-selected language if the cookie exists else it sets the default culture to English.

///   
 /// Application AcquireRequestState  
 ///   
 ///   
 ///   
 protected void Application_AcquireRequestState(object sender,   
EventArgs e)  
 {  
  
     string culture;  
     HttpCookie cookie = Request.Cookies["UserLanguage"];  
     if (cookie != null && cookie.Value != null   
        && cookie.Value.Trim() != string.Empty)  
         culture = cookie.Value;  
     else  
         culture = "en";  
  
     //Default Language/Culture for all number, Date format  
     System.Threading.Thread.CurrentThread.CurrentCulture =  
     System.Globalization.CultureInfo.CreateSpecificCulture("en");  
  
     //Ui Culture for Localized text in the UI  
     System.Threading.Thread.CurrentThread.CurrentUICulture =  
     new System.Globalization.CultureInfo(culture);  
 }

Step 11
 
In this step, you will implement a customized JavaScript bundle translator class. It helps to bundle the JavaScript with the respective user-selected language translated messages if any exists in the JavaScript file like alert, input validation messages and so on.
So, first create a new folder named “ResourceHandler”. For that right-click on the project “MultiLingualMVCApp” then select “Add” and click on “Add New Folder” and provide the name as “ResourceHandler” and then add a class file “JSTranslator” under the newly created folder "ResourceHandler".

Replace the “JSTranslator.cs” file code with the following code.

    using System.Text.RegularExpressions;  
    using System.Web;  
    using System.Web.Optimization;  
      
    namespace MultiLingualMVCApp.ResourceHandler  
    {  
        public class JSTranslator : IBundleTransform  
        {  
            #region IBundleTransform  
      
            ///   
            /// IBundleTransform Process method  
            ///   
            /// Bundle Context  
            /// Bundle Response  
            public void Process(BundleContext context, BundleResponse response)  
            {  
                string translated = ScriptTranslator(response.Content);  
                response.Content = translated;  
            }  
     
            #endregion  
     
            #region Localization Of Js Bundle Flow  
      
            private static readonly Regex Regex =   
                new Regex(@"GetResourceValue\(([^\))]*)\)",  
                               RegexOptions.Singleline | RegexOptions.Compiled);  
      
            ///   
            /// Translated script based on JavaScript content  
            ///   
            ///   
            ///   
            private string ScriptTranslator(string text)  
            {  
                MatchCollection matches = Regex.Matches(text);  
                foreach (Match match in matches)  
                {  
                    object obj = HttpContext.GetGlobalResourceObject("Notifications",   
                        match.Groups[1].Value);  
                    if (obj != null)  
                        text = text.Replace(match.Value, CleanText(obj.ToString()));  
                }  
      
                return text;  
            }  
      
            ///   
            /// Format the text as Clean while displaying  
            /// in JavaScript notifications  
            ///   
            ///   
            ///   
            private static string CleanText(string text)  
            {  
                text = text.Replace("'", "");  
                return text;  
            }  
     
            #endregion  
        }  
    }  

 About JSTranslator.cs code
  • The JsTranslator class is inherited from the “IbundleTransform”.
  • The Process method is implemented, as it just gets the BundleResponse content and translates the JavaScript with user-selected language alerts, if any, using the ScriptTranslator method and will be assigned back to that content to the BundleResonse.
  • The Regex expression is the key term we used in script files, based on that formatted the regex expression.
  • The Regex Key Term example, you used in scripts is: GetResourceValue(ResourceKeyName)
  • The ScriptTranslator method first gets the MatchCollection object based on regex expression and then based on the Match collection key name get the translated value using the method “GetGlobalResourceObject”
  • The GetGlobalResourceObject takes the parameters of Resource file name and Resource Key name.
  • The CleanText method helps to clean if any characters that creates a problem when displaying in JavaScript.
So, you have now successfully added a custom JavaScript bundle class.

Step 12

In this step, you will add two JavaScript files with sample functions under the “Scripts” folder.
The first JavaScript file named “UserNotifications” file. It contains the following function.
function UserTermsNotification() {  
    alert('GetResourceValue(UserTermsDisplayNotification)');  
}  
The second JavaScript file is named “UserOperations”. It contains the following functions.
function AddUserMessage() {  
    alert('GetResourceValue(UserAdded)');  
}  
  
function DeleteUserMessage() {  
    alert('GetResourceValue(UserDeleted)');  
} 

Step 13
 
In this step, you will bundle the previously created JavaScript files in BundleConfig.cs (that exists in the App_Start folder) using a custom JavaScript bundle that you have created in the JSTranslator.cs file. So, add the following code block to the RegisterBundles method and also add the required namespaces; those are:
using System.Collections.Generic;
using MultiLingualMVCApp.ResourceHandler;

    using System.Web;  
      
    namespace MultiLingualMVCApp  
    {  
        public class HtmlHelpers  
        {  
            ///   
            /// Localized JavaScript bundle   
            ///   
            ///   
            ///   
            public static HtmlString LocalizedJsBundle(string fileName)  
            {  
                string culture;  
                var cookie = HttpContext.Current.Request.Cookies["UserLanguage"];  
                if (cookie != null && cookie.Value != null   
                    && cookie.Value.Trim() != string.Empty)  
                    culture = cookie.Value;  
                else  
                    culture = "en";  
                fileName = string.Concat(fileName, "-", culture);  
                var output = (HtmlString)System.Web.Optimization.Scripts  
                    .Render(fileName);  
                return output;  
            }  
        }  
    }  

Step 14
In this step, you will implement the custom HTML helper class that helps to create a custom JavaScript bundle based on your needs. So, add a new class file named HtmlHelpers under the App_Start folder and then replace that with the following code.

using System.Web;  
  
namespace MultiLingualMVCApp  
{  
    public class HtmlHelpers  
    {  
        ///   
        /// Localized JavaScript bundle   
        ///   
        ///   
        ///   
        public static HtmlString LocalizedJsBundle(string fileName)  
        {  
            string culture;  
            var cookie = HttpContext.Current.Request.Cookies["UserLanguage"];  
            if (cookie != null && cookie.Value != null   
                && cookie.Value.Trim() != string.Empty)  
                culture = cookie.Value;  
            else  
                culture = "en";  
            fileName = string.Concat(fileName, "-", culture);  
            var output = (HtmlString)System.Web.Optimization.Scripts  
                .Render(fileName);  
            return output;  
        }  
    }  
}

 In the aforesaid Steps 13 and 14, you have included the custom JavaScript bundle in the BundleConfig.cs file and created a custom HTML helper class to use that specified language bundle based on the user-selected language.

The Bundling and Minification concept is very helpful to reduce the network traffic and file size while loading the form since it minifies the multiple JavaScript files into one file and the file is being cached. If you change the file content then it automatically gets the fresh content with a new version number. So it helps to increase the page performance in all aspects.

Step 15
 
In this step, you update the “Home.cshtml” form design with the following design.


You are done with the multi-language MVC application implementation process with user language-specific JavaScript bundled minified files. So, build the application (F6) and hit the (F5) key to run the application with the following URL (http://localhost:49624/Demo/Index).
Enter the user name and select the preferred language as English then the form will be displayed like the following.


Now, click on the Submit button then it navigates to the home page like the following.


The preceding page is self-explanatory about the implemented functionality. In the similar way when you click on the "Add User" and "Delete User" buttons then it displays the alerts in the English language.
Step 16

In this step, again you navigate to this URL (http://localhost:49624/Demo/Index) and select the user language as French and check the respective outputs as shown below.


Now, click on the "Submit" button, then it navigates to the home page.


The preceding page is self-explanatory about the implemented functionality. In the similar way when you click on the "Add User" and "Delete User" buttons then it displays the alerts in the French language.
You can download the preceding discussed sample project at Source Code.

Conclusion
I hope this article provides an idea of the implementation of multilingual MVC application flow, creation of customized JavaScript bundles with translated alert messages based on user language, custom HTML helper classes, how to set user language in a cookie based on his login, Displaying Resource translation values in a form and how to maintain names and values in resource files.


Literals and Seperators in C# 6.0


This feature is very helpful to write more readable code while initializing properties and variables for numerical values with new syntax for byte and long types.

Binary:
The new syntax for declaring binary property now, you can use 0b as a prefix.
public byte BinaryCode {get; } =  0b1010; 

Long:
The new syntax for declaring long type property to provide ability to use underscore (_) as a separator. Its much easier to look at the value like billions or millions etc.
public long Number {get; } = 1_000_000_000;

Exception Filters in C# 6.0


This feature helps to filter the exception messages by providing conditional statements which returns true or false at catch block.

Suppose, if you want to log the exception in catch block only if inner exception is not null. In that scenario, you can write the code like the below.
 So, In the catch block if condition returns true then it enters into the catch block and it would log and throws the exception.
try  
{  
   //Some Exception Throws  
}  
catch(Exception ex) if(ex.InnerException != null)  
{  
   //Log the Exception and throw  
   throw;  
}  
finally  
{  
}  

Conditional Access in C# 6.0

This feature is very helpful to use in a scenario like to get the property value from the object only if object is not null.
For Example, you are considering delegate Action as the parameter to any of the method, You want to get the name from the Action Method only if Action is not null and Action.Method is not null.
You can easily get an idea by just looking the below code.

public void LogAction(Action action)  
{  
    //Before C# 6.0  
    var actionName = "Empty";  
    if (action != null && action.Method != null)  
    {  
        actionName = action.Method.Name;  
    }  
  
    //C# 6.0  
    var actionName = action?.Method?.Name ?? "Empty";  
  
}  


As per the above code in C# 6.0, action is not null and Method is not null then only "Name" property value is assigned otherwise "Empty" value will be assigned.

Tuesday 28 October 2014

ContentResult in MVC

About

ContentResult is one of the ActionResult type in MVC. This is mostly used to display dynamic content to the user based on various conditions. So, you can return various types of content like plain text, xml, html etc.

In this article you are going to learn about the following things.
  1. ContentResult and its properties
    • Content
    • ContentType
    • ContentEncoding
  1. Return various Types of Content
    • Plain Text
    • Html
    • XML
ContentResult and its Properties

Content: Its used to send the content data in a string format.

ContentType: It helps to indicate the content type. The default content type for ContentResult is text/html; charset=utf-8.

ContentEncoding: It helps to indicate the content encoding type, the default encoding  type  for ContentResult  is UTF-8.
Return Various Types of Content

In this scenario, you will get a more idea by creating sample application with the following these steps.

Step 1:
Create a new project with the name ContentResultDemo and choose the template as Empty as shown in the following screen shots.


Now, click on Ok button then the screen would display like the below.


Step 2:
After clicking on Ok button the project would be created.  Then create a controller named as “ContentDemoController” like the below.


Now, click on "Controller" then the displayed screen is as follows.


Click on "Add"  button then the output template window is as follows.


Enter the name as "ContentDemoController" as mentioned in the aforesaid screenshot and then click on "Add" button then controller would be created and its displayed like the below.


Step 3:
Now, Replace the default code in the ContentDemoController.cs file with the following code.

using System.Web.Mvc;

namespace ContentResultDemo.Controllers
{
    public class ContentDemoController : Controller
    {
        // GET: ContentDemo
        public ActionResult Index()
        {
            return Content("test content");
        }
    }
}

And then Build the application (hit F6) and run the application (hit F5) then navigate to the following Url (http://localhost:50589/ContentDemo/)

Note: The port address in the above Url might be a chance to changed at your end.

The output screen looks like below.


Till now, you have created one Index action method with sample test content in the ContentDemoController.cs  file.

Step 4:

Add the following code in ContentDemo controller class file which helps to return sample content based on its content type.

        /// 
        /// Returns sample content based on its content type
        /// 
        /// content type
        /// As String
        public string SampleContent(int contentType)
        {
            switch (contentType)
            {
                case (int)ContentTypes.PlainText:
                    return "Plain Text";
                case (int)ContentTypes.Html:
                    return "
Name
Ramchand
Test
"; case (int)ContentTypes.Xml: return "" + "Ramchand" + "Srinivas" + ""; default: return string.Empty; } } /// /// Content Types enum /// public enum ContentTypes { PlainText = 1, Html, Xml }


Plain Text:

To display the plain text by using ContentResult as return type, you have to add the below action method.


        /// 
        /// Returns Plain Content
        /// 
        /// 
        public ActionResult PlainContent()
        {
            return Content(SampleContent((int)ContentTypes.PlainText), 
                        "text/plain");
        }

Now, run the application (hit F5) and navigate to this Url (http://localhost:50589/ContentDemo/PlainContent) then the displayed output is like the below.


Html:

To display the Html output, add the following action controller method with this code

        /// 
        /// Returns Html Content
        /// 
        /// 
        public ActionResult HtmlContent()
        {
            return Content(SampleContent((int)ContentTypes.Html), 
                        "text/html");
        }

Now, run the application (hit F5) and navigate to this Url (http://localhost:50589/ContentDemo/HtmlContent) then the displayed output is like the below.


Xml:

To display the Xml output, add the below action method in the ContenDemoController.cs file

        /// 
        /// Returns Xml Content
        /// 
        /// 
        public ActionResult XmlContent()
        {
            return Content(SampleContent((int)ContentTypes.Xml), 
                        "application/xml");
        }

Now, run the application (hit F5) and navigate to this Url (http://localhost:50589/ContentDemo/XmlContent) then the displayed output is like the below.


As, you have observed in the above examples, the Content property for Content Result is only string. Even though while displaying at browser it would changes based on the content type which you have specified in the Content Result.

The whole code you have implemented in the ContentDemoController.cs file is as follows.

using System.Web.Mvc;

namespace ContentResultDemo.Controllers
{
    public class ContentDemoController : Controller
    {
        // GET: ContentDemo
        public ActionResult Index()
        {
            return Content("test content");
        }

        /// 
        /// Returns Plain Content
        /// 
        /// 
        public ActionResult PlainContent()
        {
            return Content(SampleContent((int)ContentTypes.PlainText), 
                        "text/plain");
        }

        /// 
        /// Returns Html Content
        /// 
        /// 
        public ActionResult HtmlContent()
        {
            return Content(SampleContent((int)ContentTypes.Html),
                        "text/html");
        }

        /// 
        /// Returns Xml Content
        /// 
        /// 
        public ActionResult XmlContent()
        {
            return Content(SampleContent((int)ContentTypes.Xml), 
                        "application/xml");
        }

        /// 
        /// Returns sample content based on its content type
        /// 
        /// content type
        /// As String
        public string SampleContent(int contentType)
        {
            switch (contentType)
            {
                case (int)ContentTypes.PlainText:
                    return "Plain Text";
                case (int)ContentTypes.Html:
                    return "
Name
Ramchand
Test
"; case (int)ContentTypes.Xml: return "" + "Ramchand" + "Srinivas" + ""; default: return string.Empty; } } /// /// Content Types enum /// public enum ContentTypes { PlainText = 1, Html, Xml } } }

Conclusion
 
I hope you got an idea about ContentResult and its properties and how can you send various types of content by just changing the ContentType property in ContentResult. Please provide your suggestions and comments if any.

Wednesday 22 October 2014

JsonResult Type in MVC

About
JsonResult is an ActionResult type in MVC. It helps to send the content in JavaScript Obect Notation (JSON) format.
History
To learn more about ActionResult and some of the other following action result types, please go through the following articles in my blog.
  1. Action Result
  2. View Result
  3. Partial View Result with sample application
  4. Prevent PartialView to access directly from the URL
RoadMap
In this article, you will get an idea of the following things.
  1. About JsonResult and its properties
    • ContentEncoding
    • ContentType
    • Data
    • JsonRequestBehavior
    • MasJsonLength
    • RecursionLimit
  2. Sample project with various scenarios using JsonResult:
    • Send JSON content welcome note based on user type
    • Get the list of users in JSON Format
    • How to create JSON data at the client side and send it to the controller
    • How to handle a huge amount of JSON Data
  1. Unit Testing of JsonResult
About JsonResult and its properties
The JSON format is an open standard format. The format of data looks very easy to understand and the data objects consist of attribute-value pairs.
ContentEncoding: It helps to indicate the content encoding type, the default encoding for JSON is UTF-8.
ContentType: It helps to indicate the content type. The default content type for JSON is application/json; charset=utf-8.
Note: ContentType and ContentEncoding are not necessary to mention when sending the data in JSON format as the HTTP headers are having a responsibility to tell the recipient what kind of content they're dealing with.
Data: This indicates what the content data is, that means what you will send in JSON format.
JsonRequestBehavior: This property has two options. Those are AllowGet and DenyGet. The default option is DenyGet. When you send data in JSON format, using Get Request, it's necessary to specify the property as AllowGet otherwise it shows the error as “The request would be blocked since the JSON data is considered as sensitive data information”.
MaxJsonLength: This helps to get or set the maximum JSON content length that you will send. The default value for this is 2097152 characters, that is equal to 4 MB of Unicode string data. You can even increase the size based if needed, for that you will get an idea later in this article.
RecursionLimit: Indicates the constraining number of object levels to process. The default value is 100. It means you can serialize the objects that are nested to a depth of 100 objects referencing each other. In a general scenario the default limit 100 is obviously sufficient when you deal with a JsonResult so there is no need to increase it even though you have the option to increase the limit if required.
Sample Project with Various Scenarios by using JsonResult
Create a new project with the name JsonResultDemo and choose the template as MVC as shown in the following screen shots.


Now, click on the OK button then the displayed screen is as in the following.


As in the preceding template, you need to select the “Add Unit Tests” option as well. So It helps to create a Unit Test project and then again click on the OK button then the project will be created and the startup application page displayed like the following.


Now, add a controller and provide the name as “JsonDemoController” as in the following.


Click on the Controller and then it wil open the popup window as in the following.


Now click on the “Add” button and then it opens a popup to enter the name. So enter the name as “JsonDemoController” as shown in the screen shot.


After adding the controller to the project the controller page looks like the following.


Until now, you are done with the creation of the sample project template with the addition of one controller named “JsonDemoController”.

Scenario 1: Send JSON Content welcome note based on user type

In this scenario, you will learn how to send a simple welcome note message in JSON format from the controller. Now, replace the existing code with the following code in the JsonDemoController.cs file.

using System;  
using System.Collections.Generic;  
using System.Text;  
using System.Web.Mvc;  
using System.Web.Script.Serialization;  
using JsonResultDemo.Models;  
  
namespace JsonResultDemo.Controllers  
{  
    public class JsonDemoController : Controller  
    {  
        #region ActionControllers  
  
        ///   
        /// Welcome Note Message  
        ///   
        /// In a Json Format  
        public JsonResult WelcomeNote()  
        {  
            bool isAdmin = false;  
            //TODO: Check the user if it is admin or normal user, 
            //(true-Admin, false- Normal user)  
            string output = isAdmin ? "Welcome to the Admin User" 
                            : "Welcome to the User";  
  
            return Json(output, JsonRequestBehavior.AllowGet);  
        }  
     }  
}  

Then, build the application (F6) and then hit the F5 to run an application and then navigate to the following URL http://localhost:49568/JsonDemo/WelcomeNote (It might be a chance to get a different Port Id at your end).
Then the displayed screen looks like the following.


In this scenario, you now have an idea of how to send a simple string in JSON format.

Scenario 2: Get the list of users in JSON Format

In this scenario you will send a list of users in JSON format.
Step 1: Add a class file “UserModel.cs” like the following.


Click on “Class” and then the displayed link is as the following.


Enter the name as “UserModel.cs” and then click on the Add button.
Step 2: Update the code in UserMode.cs with the following code.

using System;  
using System.Collections.Generic;  
using System.Linq;  
using System.Web;  
  
namespace JsonResultDemo.Models  
{  
    public class UserModel  
    {  
        public int UserId { get; set; }  
        public string UserName { get; set; }  
        public string Company { get; set; }  
    }  
}  

Step 3: Add one method named GetUsers in the JsonDemoController.cs file that will return the list of sample users.  

        
        ///   
        /// Get the Users  
        ///   
        ///   
        private List GetUsers()  
        {  
            var usersList = new List  
            {  
                new UserModel  
                {  
                    UserId = 1,  
                    UserName = "Ram",  
                    Company = "Mindfire Solutions"  
                },  
                new UserModel  
                {  
                    UserId = 1,  
                    UserName = "chand",  
                    Company = "Mindfire Solutions"  
                },  
                new UserModel  
                {  
                    UserId = 1,  
                    UserName = "Abc",  
                    Company = "Abc Solutions"  
                }  
            };  
  
            return usersList;  
        }

Step 4: Create one Action Controller method named GetUsersData with the following code in the JsonDemoController.cs file.  

///   
/// Get tthe Users data in Json Format  
///   
///   
public JsonResult GetUsersData()  
{  
    var users = GetUsers();  
    return Json(users, JsonRequestBehavior.AllowGet);  
}  

Step 5: Run the application with this URL http://localhost:49568/JsonDemo/GetUsersData then the output looks like the following.


Scenario 3 : Create JSON data at the client side and send content to the controller
In this scenario, you will create JSON data at the client side and then that data will be sent to the Controller action. The controller action request type is HttpPost.
Step 1: Create one Action controller method named Sample like the following in the JsonDemoController.cs file.

///   
/// Sample View  
///   
///   
public ActionResult Sample()  
{  
    return View();  
}  

Step 2: Create a View file named “Sample.cshtml” by right-clicking on View() in the Sample action controller method then click on “Add View” in the Sample action like the following.


By clicking on Add View it opens a popup and deselects the "Use a layout page" option. It then should look as in the following.


Now, click on the OK button then the sample.cshtml file will be created.
Step 3: Replace it with the following cshtml code in the sample.cshtml file.

@{  
    Layout = null;  
} 


        Create Sample JSON Data and send it to controller  


The following is a brief description of the Sample.cshtml file:
  • The HTML body contains a label, about, to describe the functionality and one input button with an onclick of the UpdateUserDetail() function.

  • The JavaScript part contains the jQuery reference and it contains two functions.

  • GetSampleUsersList() will return the sample users in a stringified JSON format.

  • UpdateUserDetail() sends the ajax request of post type for JsonDemoController with UpdateUserDetail action.
Step 4: A Create Action method named UpdateUsersDetail in the JsonDemoController as in the following and put a breakpoint in this method on the first line of code to help to trace the details.

///   
/// Update the user details  
///   
/// users list in JSON Format  
///   
[HttpPost]  
public JsonResult UpdateUsersDetail(string usersJson)  
{  
    var js = new JavaScriptSerializer();  
    UserModel[] user = js.Deserialize(usersJson);  
  
    //TODO: user now contains the details, you can do required operations  
    return Json("User Details are updated");  
}

Step 5: Build and run the application (hit F5) with the URL ( http://localhost:49568/JsonDemo/Sample ) then the resultant screen looks like the following.


Step 6: Now, click on the “Update User Detail” button as it appears in the aforesaid screenshot. Then the resultant screen looks like the following.


Step 7: Just review the preceding image, you can identify that you are able to send the JSON data to the controller action from the client side and as well as you have deserialized the JSON data and assigned that data to the UserModel entity.
Scenario 4: How to handle huge amount of JSON Data
In this scenario, you will get an idea of how to send a huge amount of JSON Data. Actually in certain scenarios you must send a huge amount of data from a controller to a view. In that case the following example will be helpful to you.
Step 1: Create one method named GetUsersHugeData() as in the following. It just helps to generate sample user data.

///   
/// Get the huge list of users  
///   
///   
private List GetUsersHugeData()  
{  
 var usersList = new List();  
 UserModel user;  
 for (int i = 1; i < 51000; i++)  
 {  
  user = new UserModel  
  {  
   UserId = i,  
   UserName = "User-"+i,  
   Company = "Company-"+i  
  };  
  usersList.Add(user);  
 }  

 return usersList;  
} 

Step 2: Create an Action method named GetUsersHugeList() like the following in the JsonDemoController.cs file.

    ///   
    /// Get the huge list of Users  
    ///   
    ///   
    public JsonResult GetUsersHugeList()  
    {  
        var users = GetUsersHugeData();  
        return Json(users, JsonRequestBehavior.AllowGet);  
    } 


Step 3: Now, build and run (hit F5) the application with the URL ( http://localhost:49568/JsonDemo/GetUsersHugeList ) then the error screen appears like the following.


Step 4: To fix the preceding error add the following code in the JsonDemoController file. This methods helps to update the MaxJsonLength property value to Int32.MaxValue.

///   
/// Override the JSON Result with Max integer JSON lenght  
///   
/// Data  
/// Content Type  
/// Content Encoding  
/// Behavior  
/// As JsonResult  
protected override JsonResult Json(object data, string contentType,  
    Encoding contentEncoding, JsonRequestBehavior behavior)  
{  
    return new JsonResult()  
    {  
        Data = data,  
        ContentType = contentType,  
        ContentEncoding = contentEncoding,  
        JsonRequestBehavior = behavior,  
        MaxJsonLength = Int32.MaxValue  
    };  
}

In the same way, you can increase the RecursionLimit property value. Also if you require JsonData with a depth (nested levels) greater than 100.
Step 5: Now, build and run (hit F5) the application with the URL ( http://localhost:49568/JsonDemo/GetUsersHugeList ) and then the huge data result appears instead of an error.


I have provided the formatted complete code for the JsonDemoController.cs file for what you have done until now in the aforesaid scenarios.


using System;  
using System.Collections.Generic;  
using System.Text;  
using System.Web.Mvc;  
using System.Web.Script.Serialization;  
using JsonResultDemo.Models;  
  
namespace JsonResultDemo.Controllers  
{  
    public class JsonDemoController : Controller  
    {  
        #region ActionControllers  
  
        ///   
        /// Welcome Note Message  
        ///   
        /// In a JSON Format  
        public JsonResult WelcomeNote()  
        {  
            bool isAdmin = false;  
            //TODO: Check the user if it is admin or normal user, (true-Admin, false- Normal user)  
            string output = isAdmin ? "Welcome to the Admin User" : "Welcome to the User";  
  
            return Json(output, JsonRequestBehavior.AllowGet);  
        }  
  
        ///   
        /// Get tthe Users data in JSON Format  
        ///   
        ///   
        public JsonResult GetUsersData()  
        {  
            var users = GetUsers();  
            return Json(users, JsonRequestBehavior.AllowGet);  
        }  
  
        ///   
        /// Sample View  
        ///   
        ///   
        public ActionResult Sample()  
        {  
            return View();  
        }  
  
        ///   
        /// Update the user details  
        ///   
        /// users list in JSON Format  
        ///   
        [HttpPost]  
        public JsonResult UpdateUsersDetail(string usersJson)  
        {  
            var js = new JavaScriptSerializer();  
            UserModel[] user = js.Deserialize(usersJson);  
  
            //TODO: user now contains the details, you can do required operations  
            return Json("User Details are updated");  
        }  
          
        ///   
        /// Get the huge list of Users  
        ///   
        ///   
        public JsonResult GetUsersHugeList()  
        {  
            var users = GetUsersHugeData();  
            return Json(users, JsonRequestBehavior.AllowGet);  
        }  
 
        #endregion  
 
 
        #region Methods  
  
        ///   
        /// Get the Users  
        ///   
        ///   
        private List GetUsers()  
        {  
            var usersList = new List  
            {  
                new UserModel  
                {  
                    UserId = 1,  
                    UserName = "Ram",  
                    Company = "Mindfire Solutions"  
                },  
                new UserModel  
                {  
                    UserId = 1,  
                    UserName = "chand",  
                    Company = "Mindfire Solutions"  
                },  
                new UserModel  
                {  
                    UserId = 1,  
                    UserName = "Abc",  
                    Company = "Abc Solutions"  
                }  
            };  
  
            return usersList;  
        }  
  
        ///   
        /// Get the huge list of users  
        ///   
        ///   
        private List GetUsersHugeData()  
        {  
            var usersList = new List();  
            UserModel user;  
            for (int i = 1; i < 51000; i++)  
            {  
                user = new UserModel  
                {  
                    UserId = i,  
                    UserName = "User-"+i,  
                    Company = "Company-"+i  
                };  
                usersList.Add(user);  
            }  
  
            return usersList;  
        }  
  
        ///   
        /// Override the Json Result with Max integer JSON lenght  
        ///   
        /// Data  
        /// Content Type  
        /// Content Encoding  
        /// Behavior  
        /// As JsonResult  
        protected override JsonResult Json(object data, string contentType,  
            Encoding contentEncoding, JsonRequestBehavior behavior)  
        {  
            return new JsonResult()  
            {  
                Data = data,  
                ContentType = contentType,  
                ContentEncoding = contentEncoding,  
                JsonRequestBehavior = behavior,  
                MaxJsonLength = Int32.MaxValue  
            };  
        }  
 
        #endregion  
    }  
}

You now have an idea of how to use a JsonResult type in MVC application with various scenarios. Now, it's time to test the controller action methods using the JsonDemoController.Test project.
Unit Testing the JsonResult in MVC

The main feature of MVC applications is it supports the Test Data Driven (TDD) approach. Since the Controller file is just a kind of class file, it's easy to implement the Test methods in the Test Project. Now you will learn how to test the JsonResult methods in the test project.
Step 1: Add a class file named “JsonDemoControllerTest.cs” to the JsonResultDemo.Tests projects like the following.


Click on “Class” to open a popup like the following and then update the name as “JsonDemoControllerTest.cs”.


Step 2: After clicking on the “Ok” button then the screen result looks like the following.


Step 3: Now, replace the existing code in the file JsonDeomControllerTest.cs with the following code.

using System;  
using System.Web.Mvc;  
using Microsoft.VisualStudio.TestTools.UnitTesting;  
using JsonResultDemo.Controllers;  
  
namespace JsonResultDemo.Tests.Controllers  
{  
    [TestClass]  
    public class JsonDemoControllerTest  
    {  
        [TestMethod]  
        public void WelcomeNote()  
        {  
            JsonDemoController controller = new JsonDemoController();  
  
            JsonResult result = controller.WelcomeNote();  
            string msg = Convert.ToString(result.Data);  
            // Assert  
            Assert.AreEqual("Welcome to the User", msg);  
        }  
    }  
}  

Brief Note about TestMethod of WelcomeNote()
  • Create an object for JsonDemoController.

  • Save the result of JsonDemoController controller method “WelcomeNote” method result in the “result” parameter of the type JsonResult.

  • The string “msg” is assigned with the value from the Json Result (result.Data).

  • In this step, you are checking the expected output with the actual output using the Assert method. In a similar way the Assert Method provides other options like AreNotEqual, AreSame, IsNotNull and so on.
Step 4: Right-click on the WelcomeNote method and click on “Run Unit Tests” then the screen result looks like the following.


Step 5: You can also do the “Run Tests” by the clicking of (Ctrl +R, T). Then you can view the results in Test Explorer like the following.


Step 6: As you noticed in the Test Explorer screen shot it contains so many options like “Run All” and Run the selected/required options. You can try with those and will get an idea of it easily.


In a similar way, you can create more test methods and it will be helpful to check the functionality in various cases since it provides correct results or not.
Note: you can download the preceding discussed sample project from the link Source Code.

Conclusion

I hope this article gives you an idea of JsonResult, JsonResult Properties, the usage of JsonResult with various scenarios and how can you test the JsonResult using the Test Project.
Please provide your valuable suggestions and comments on this.